I’m all about finding inexpensive craft ideas and today’s blog post is about a few craft activities that can be done with popsicle sticks. Whether its a rainy day or just spring break, kids will enjoy trying out these craft activities. Each of these 3 ideas cater to different age groups but they are all interesting and fun.
1. DIY Puzzle
Age group:
3-6
What you need:
Popsicle sticks
A picture
Double sided tape or glue
Craft knife
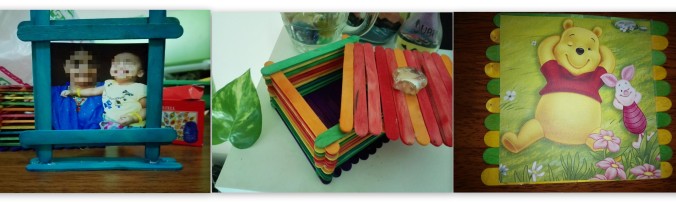
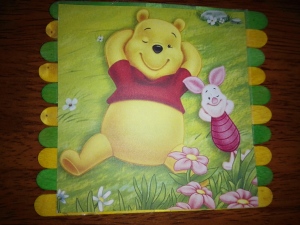
Take a print of some of your child’s favourite pictures. It could be a photo of close family members whom your child doesn’t get a chance to interact with on a daily basis or even some cartoon characters that your child loves. Here I have chosen a photo of Winnie the Pooh. (Isn’t he just adorable?)
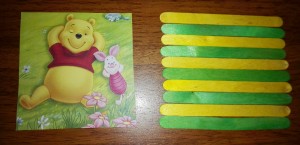
Arrange the popsicle sticks one after another. The number of sticks that you will need will depend on the size of the picture.
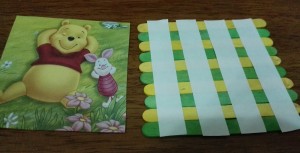
Once arranged, stick the photo onto the sticks. I’ve used double sided tape for this but you could also use some white glue instead.
Cut the picture along the sticks using a craft knife. I chose to cut them in sets of 2 – so I had a total of 5 puzzle pieces, since I had a total of 10 popsicle sticks.
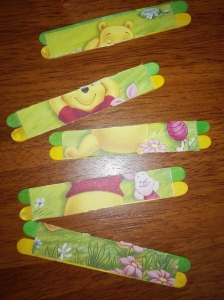
Now jumble up the sticks and hand them over to your child to arrange them in the correct order.
2. Popsicle Stick Photo Frame
Age group:
3 – 8
What you need:
Popsicle sticks
Paints, glitter, stickers
Glue
Photos
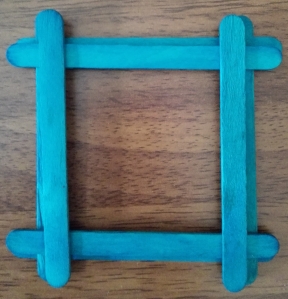
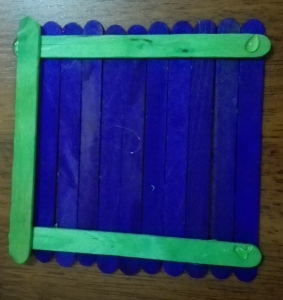
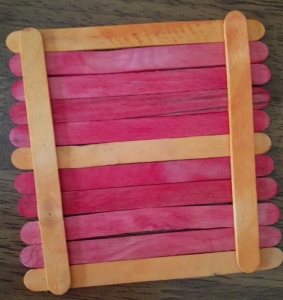
Arrange 4 popsicle sticks to form a square as shown below and glue them in place.
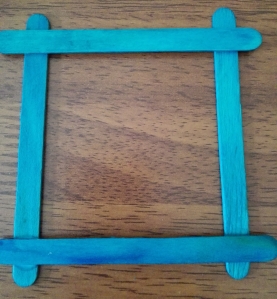
Place 4 more sticks overlapping the previous ones to form a second square inside the first one and glue them in place.
Now, glue together two more sticks to make a stand for the frame.
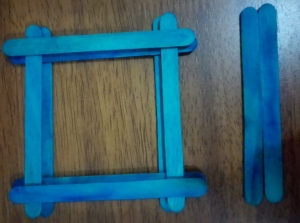
Next pop the frame upright between the two base sticks and glue them in place. Alternatively you can also skip the stand step and simply hang the photo frame with a piece of string or ribbon.
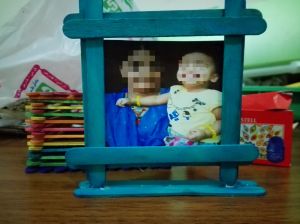
Take 2 photos and trim them to fit the frame. Insert the photos into the frame with their white sides facing each other. So one photo will be seen at the front and the other photo will be seen at the back.
Decorate the frame with paint/stickers/glitter/buttons etc.
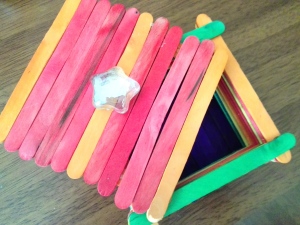
3. Popsicle Sticks Box
Age Group
4 – 7
What you need
Popsicle sticks
Glue
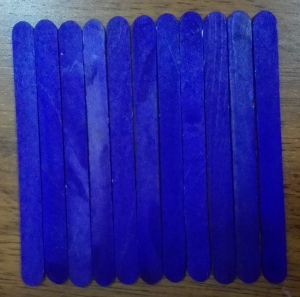
Line up 11 popsicle sticks as shown below
Take 2 popsicle sticks and glue them on either side of the set of 11 sticks in order to hold them in place as shown.
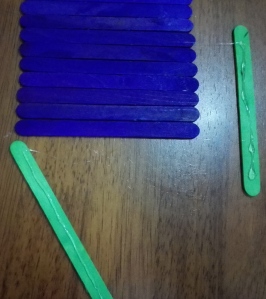
Next glue two more sticks, perpendicular to the previously glued ones as shown below.
 Repeat these steps and continue till the box reaches your desired height.
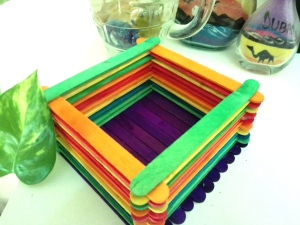
If you want the box to be an open one, you can leave it as is. Or if you want to make a lid for it, then repeat the first step again.
Now flip it over and attach a bead or stone as a handle to the lid. Done!